
If your inbox runs your business, you know how quickly it can become a time sink. Manually sorting emails, copying client details, tracking leads, it’s endless. But what if every important email could log itself into a spreadsheet, instantly and accurately?
With Gmail to Google Sheets automation, you can do just that. This guide will walk you through setting it up in Zapier without any coding, and explain why it’s a great solution for entrepreneurs who want to work smarter, not harder.
Gmail to Google Sheets automation is a workflow that connects your inbox to a spreadsheet. When a certain type of email arrives, such as a lead form, order confirmation, or client request, Zapier pulls out the key details and adds them to your Google Sheet.
It runs automatically in the background and updates your spreadsheet in real time. You won’t need to copy anything by hand or worry about missing messages. You’ll always have clean, organized data ready to use.
For entrepreneurs, time is more than just money; it’s momentum. When your inbox fills up with leads, client requests, or order updates, tracking everything by hand can slow you down.
This automation turns email chaos into clarity. Instead of reacting to every message, you build a system that captures what matters and organizes it instantly. You’ll spend less time on admin, make faster decisions, and stay focused on growth.
It’s not just about saving time. It’s also about building workflows that can grow with your business.
You can get this running in just a few minutes, even if you’re not tech-savvy. Just follow these steps to send email data from Gmail to Google Sheets, making it easy to track leads, orders, or questions with no extra hassle.
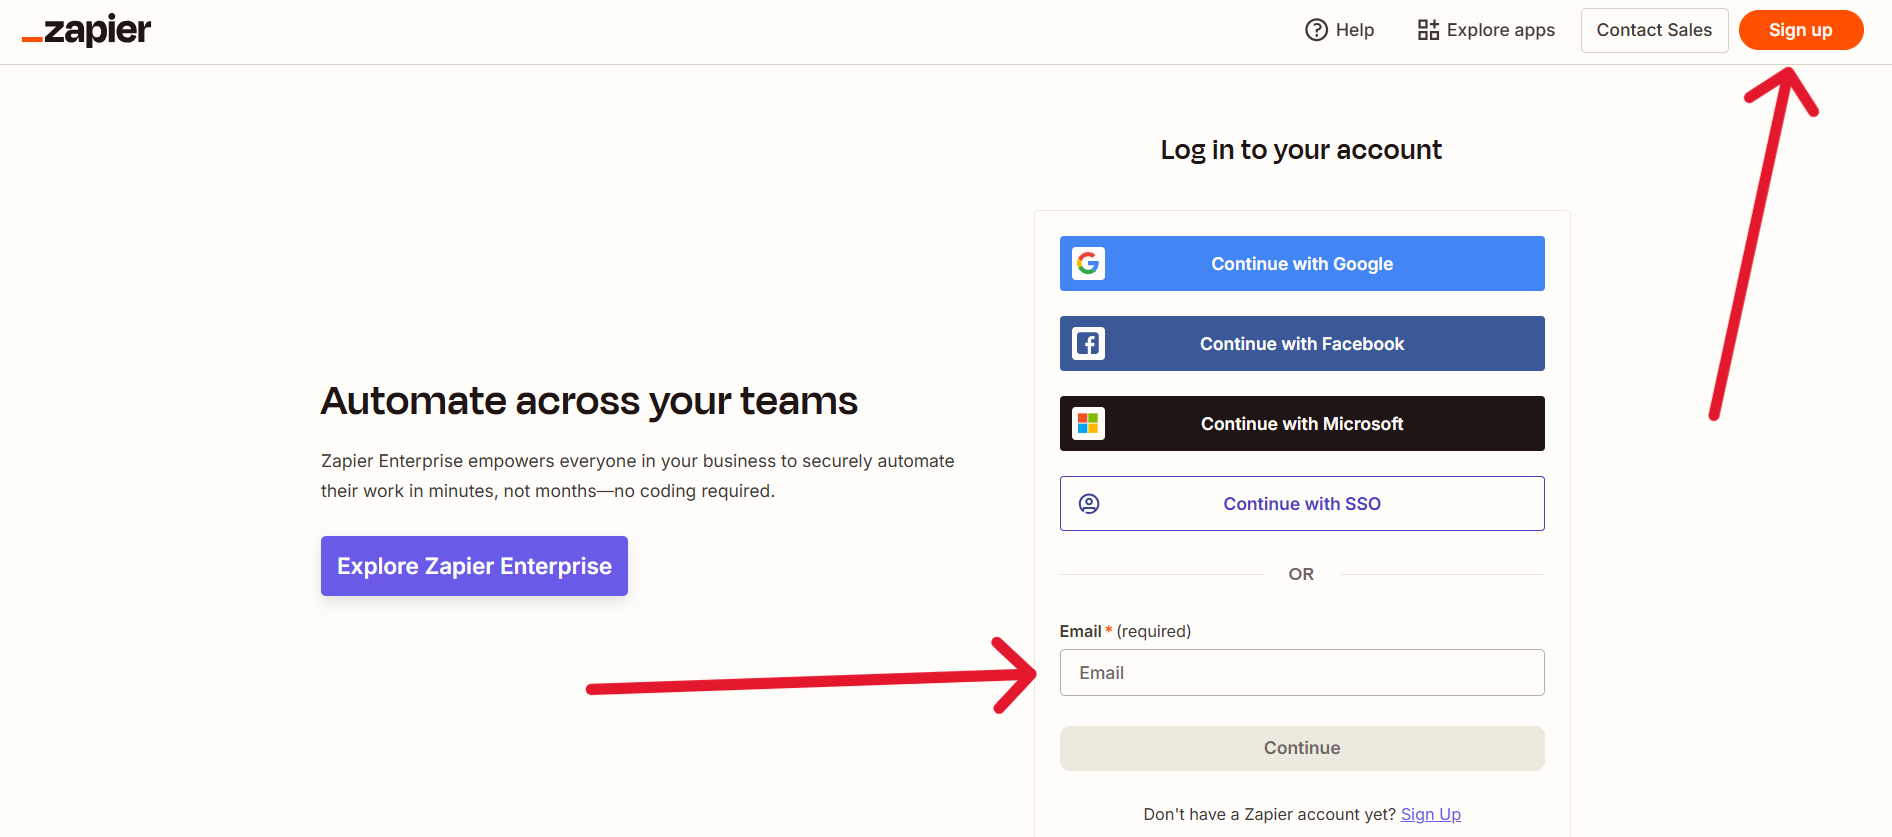
Go to zapier.com and log in. If you don’t have an account yet, click Sign Up and create one using your Google credentials. Logging in with Google makes it faster and ensures smooth integration later.
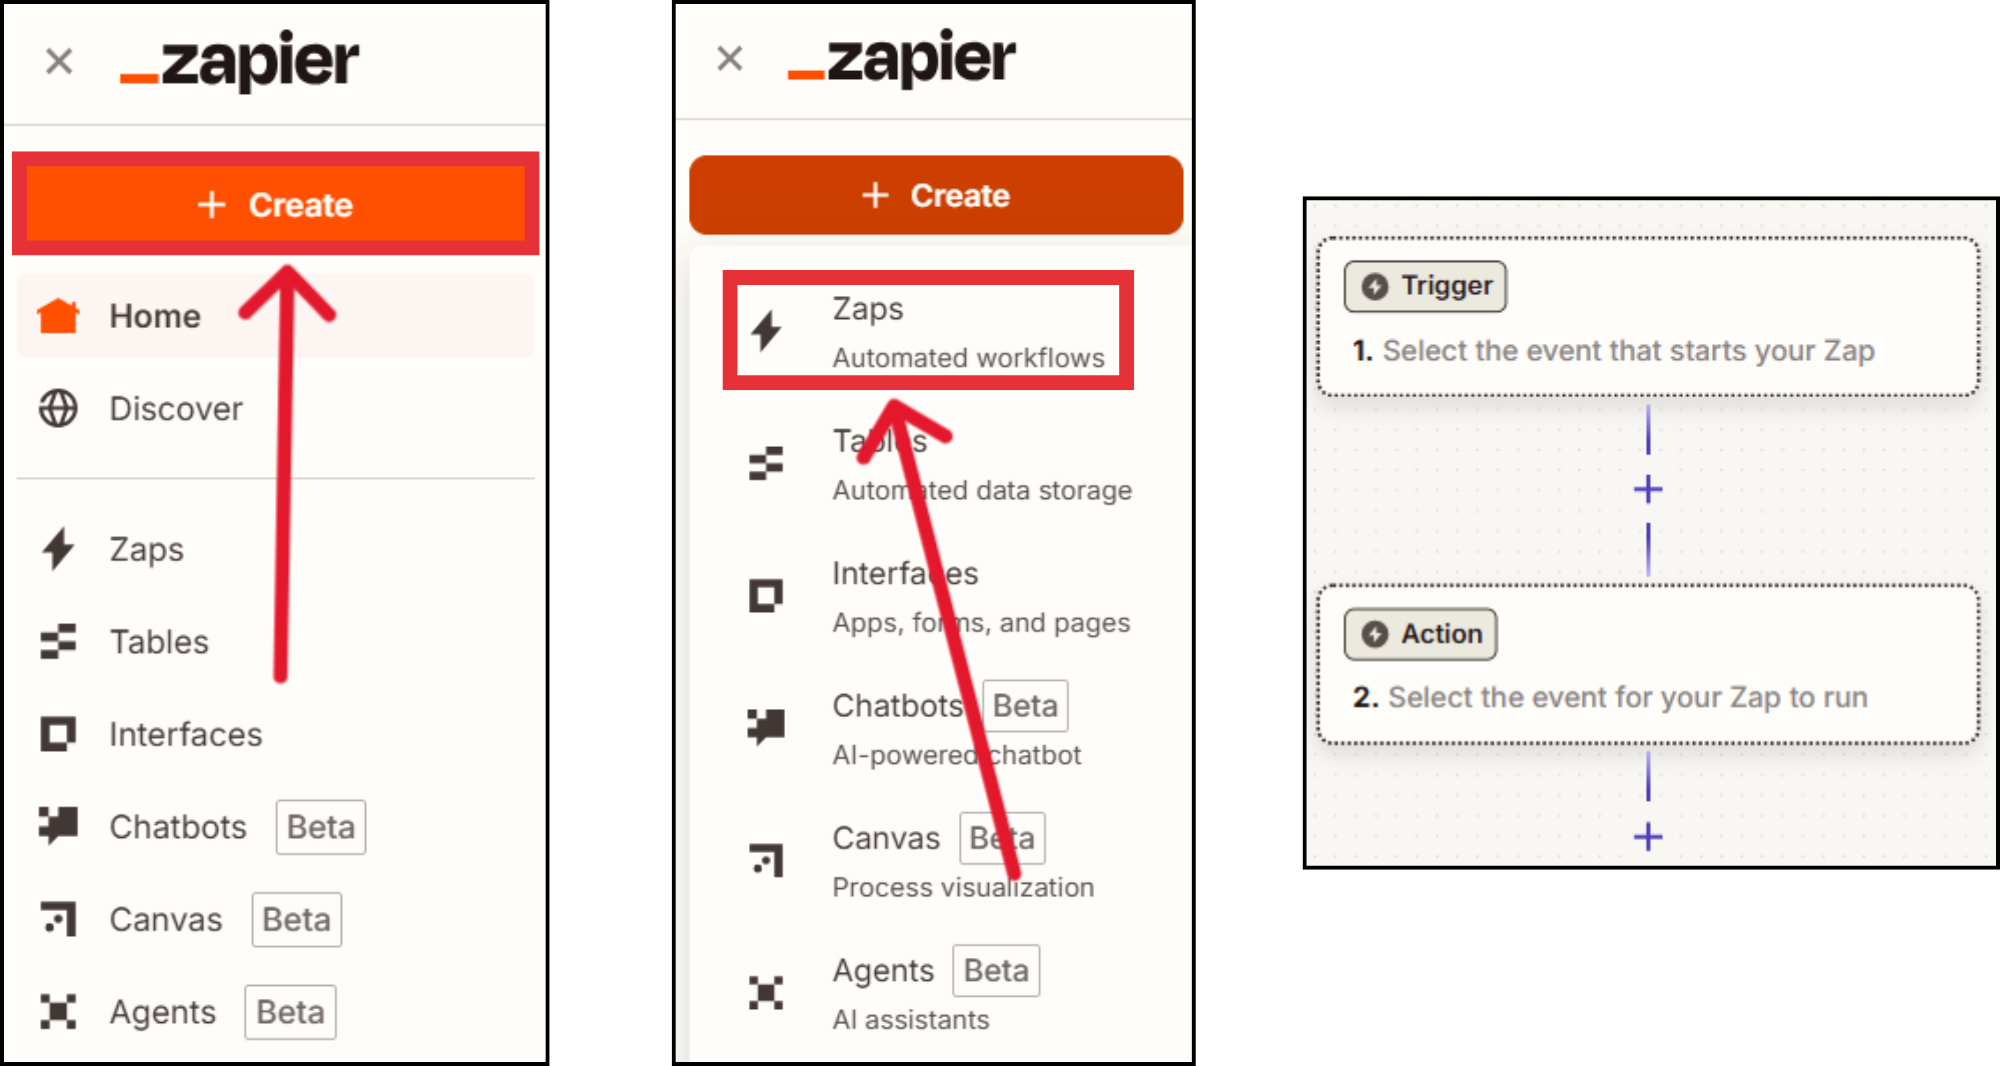
Once inside your dashboard, click +Create. This opens a drop-down menu, then select Zaps. This will launch the Zap editor, where you can start building your automation. Think of a “Zap” as a workflow that runs automatically when a trigger event occurs.
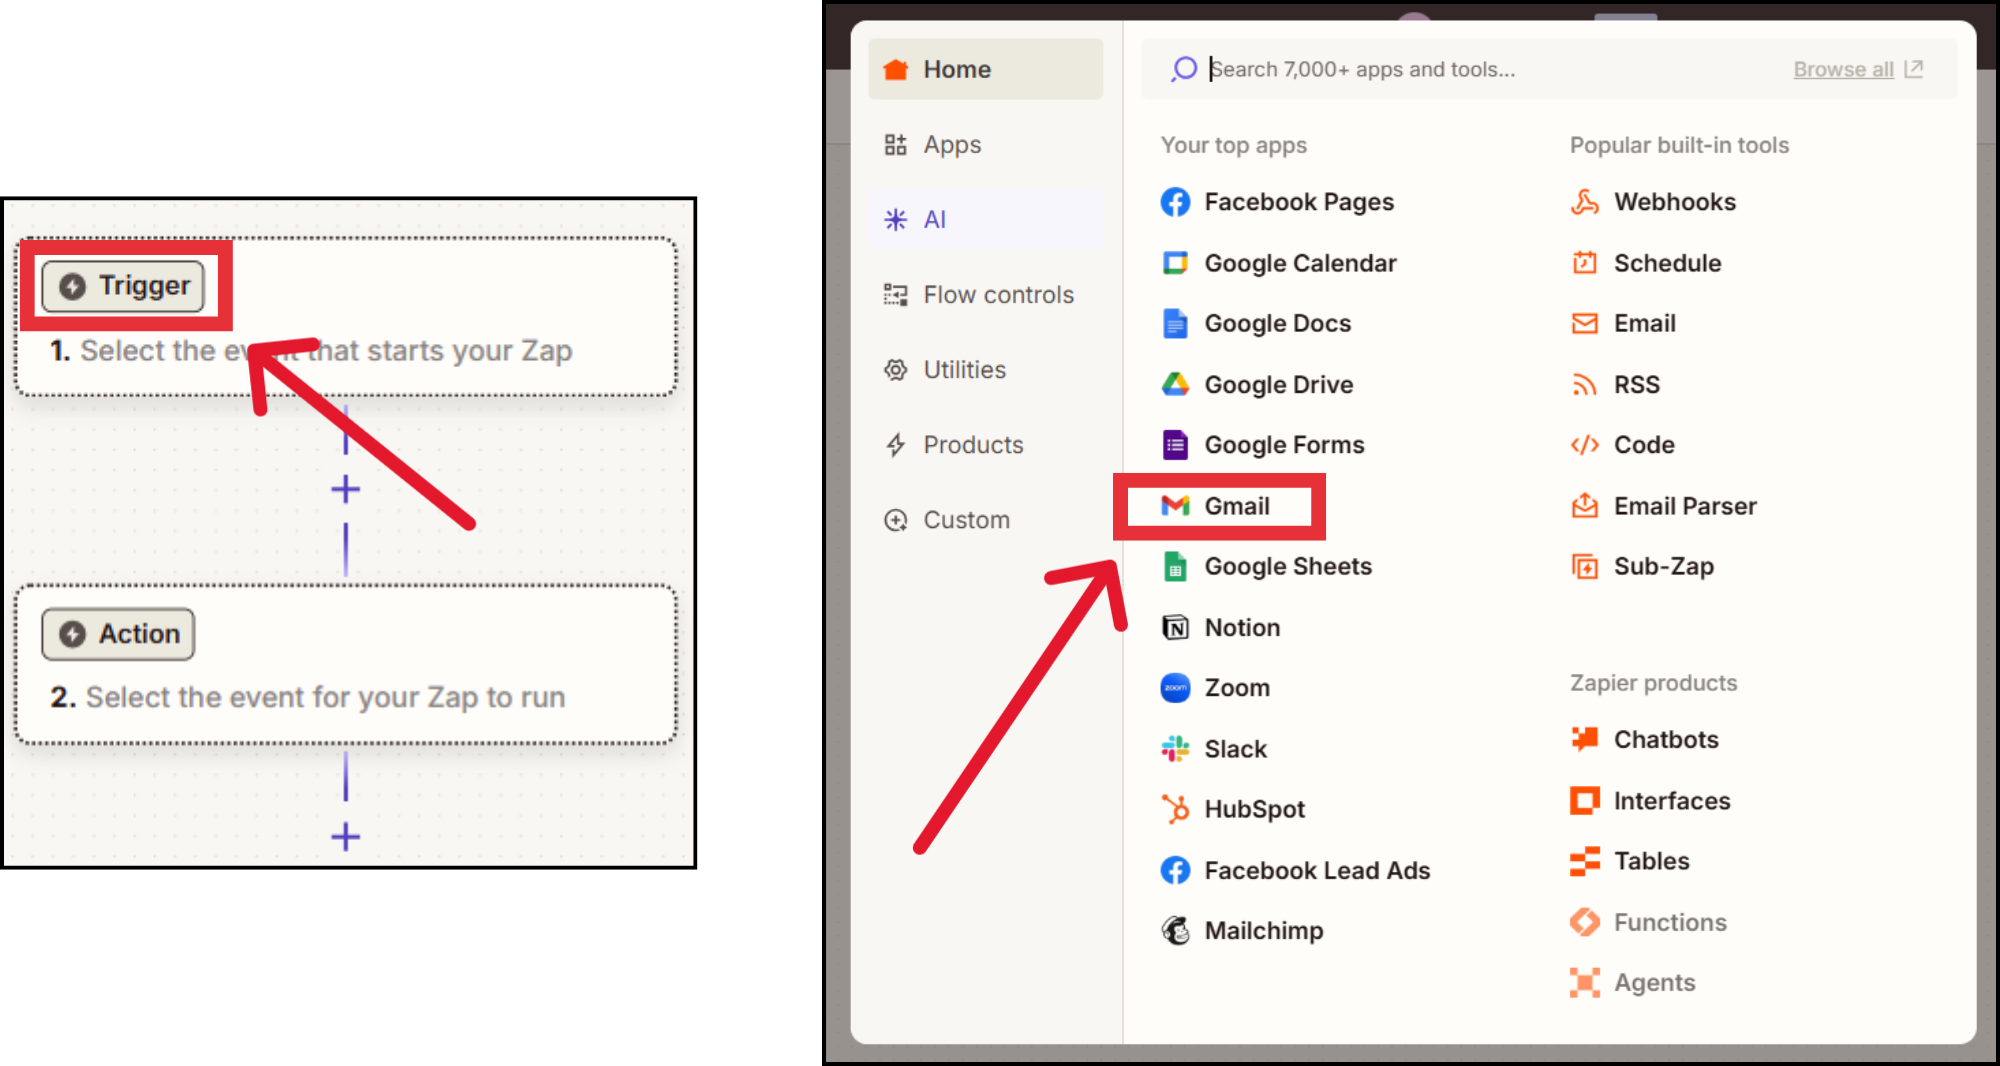
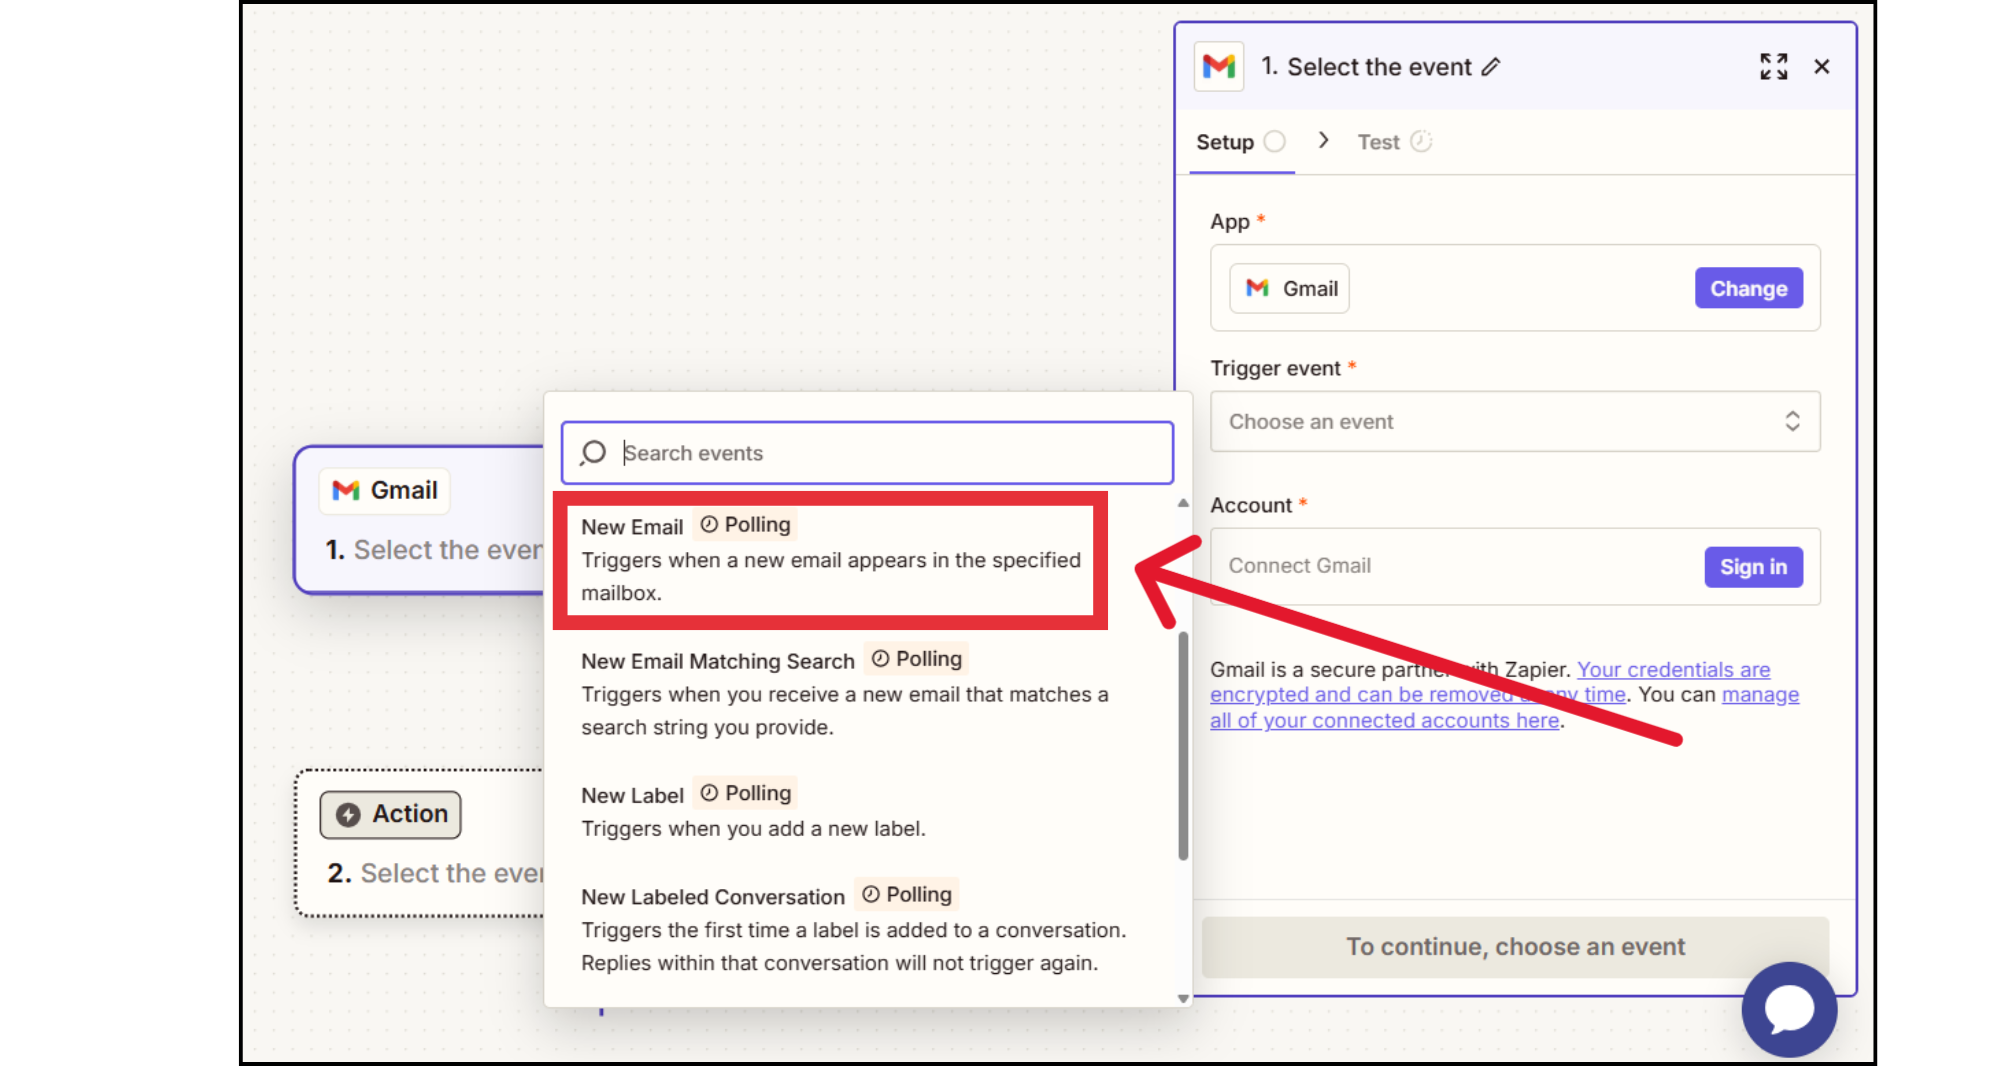
In the Trigger section, search for and select Gmail. When prompted to choose a trigger event, select New Email. This means Zapier will activate the workflow every time Gmail receives a new email in your inbox.
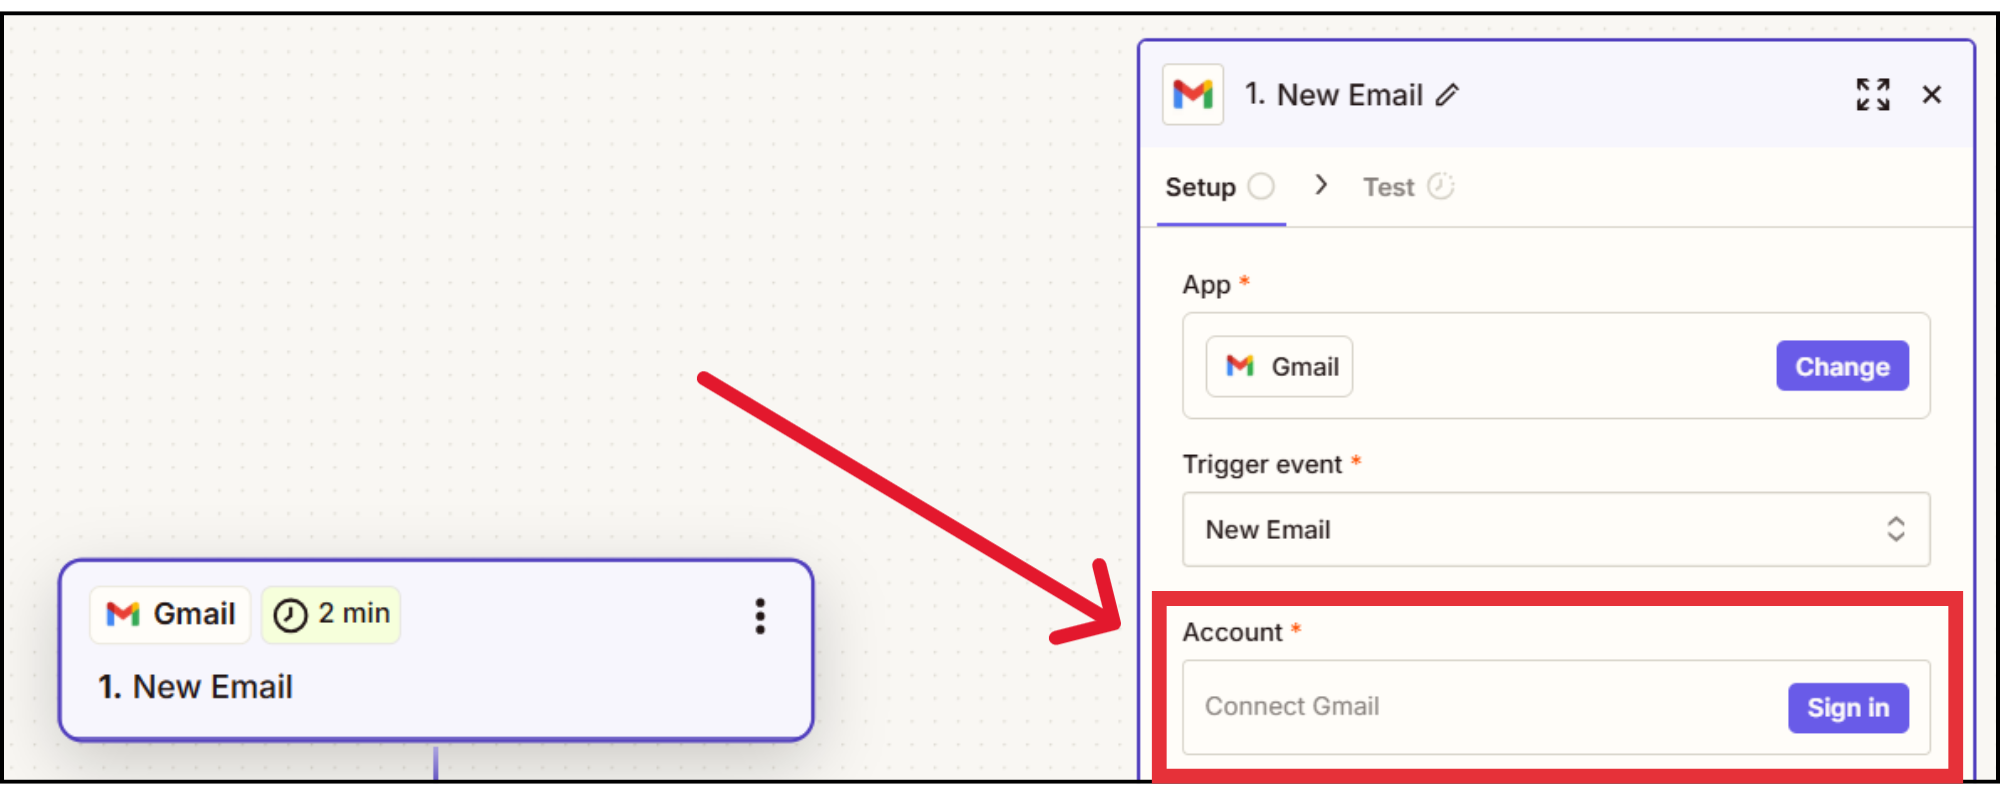
Click Sign in to Gmail and pick the account you want to use. Let Zapier access your inbox so it can read your incoming emails.
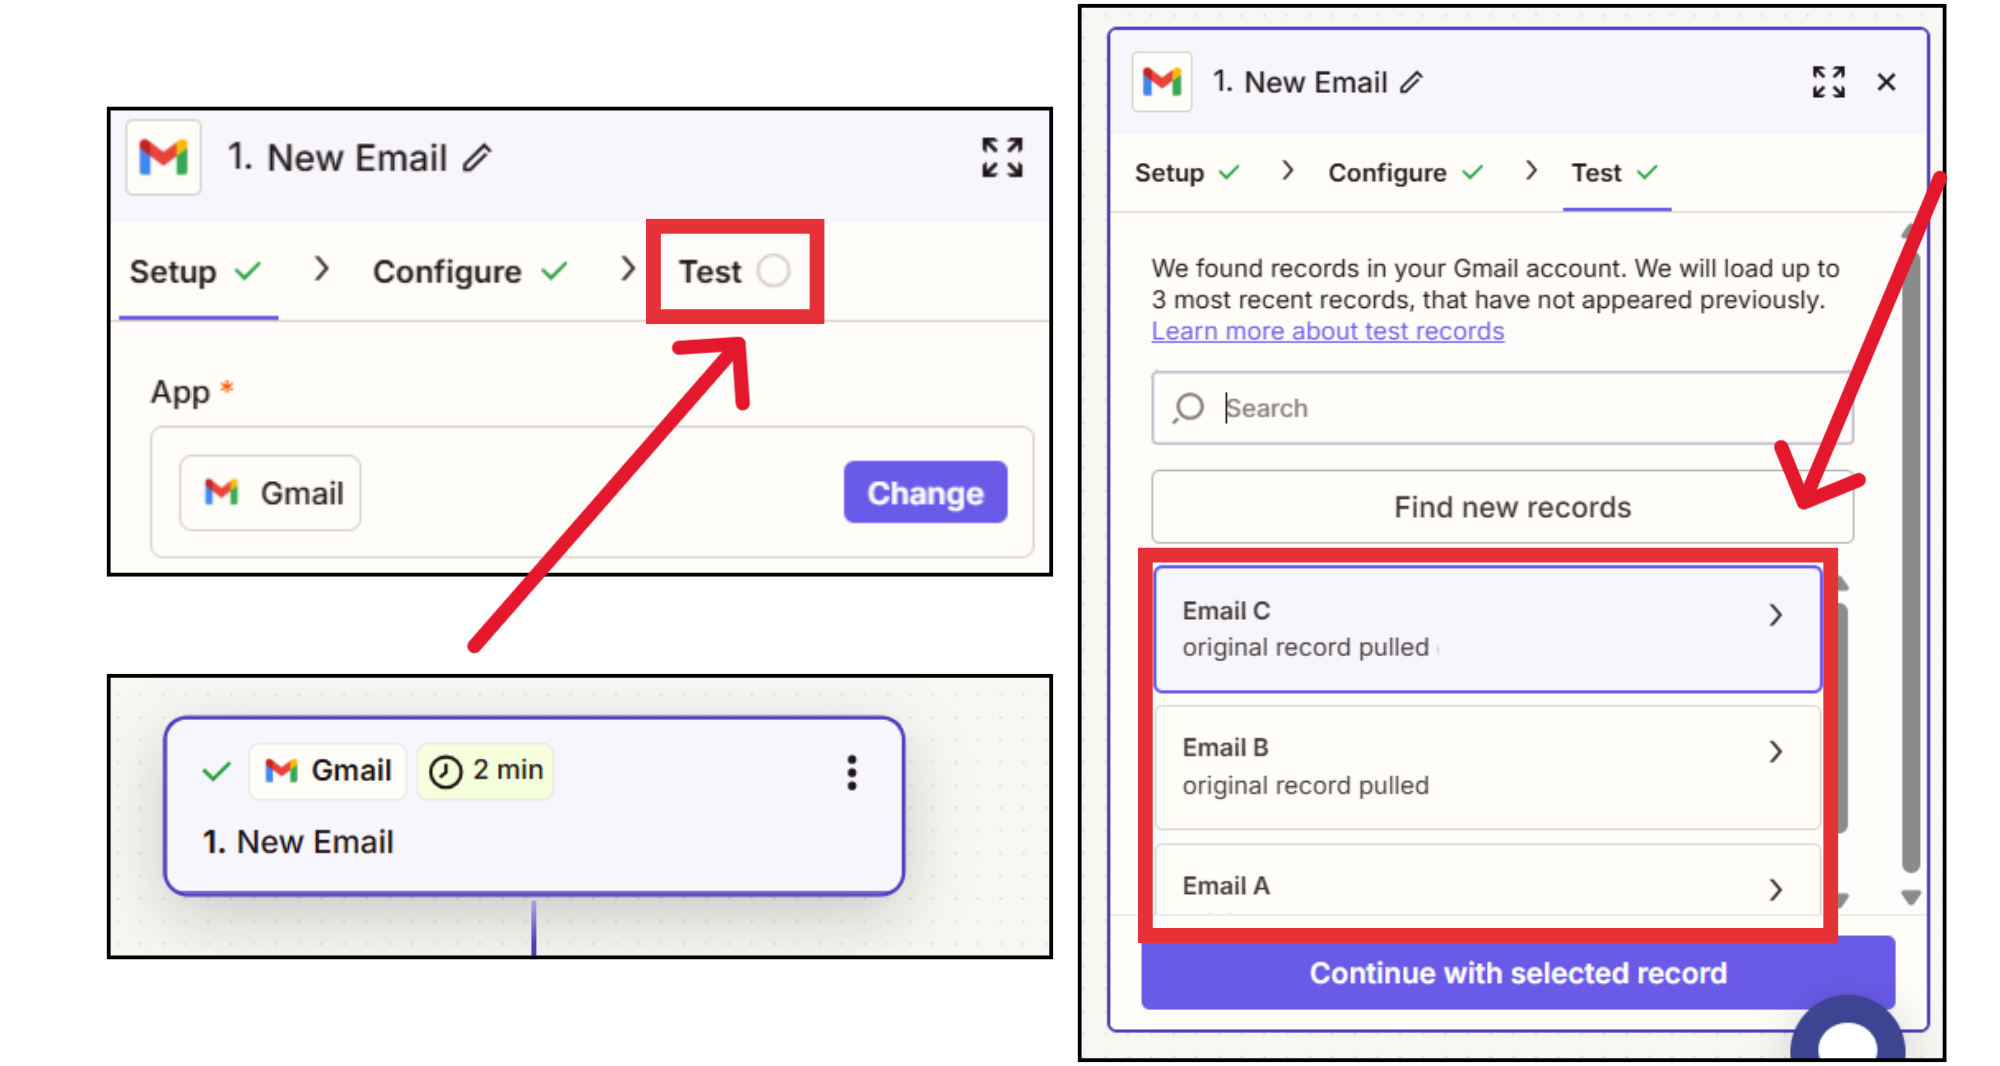
Zapier will pull in a recent email from your inbox to confirm the connection. Click Test Trigger and wait for a sample email to appear. This shows that Zapier can successfully detect new emails and use them to start your automation.
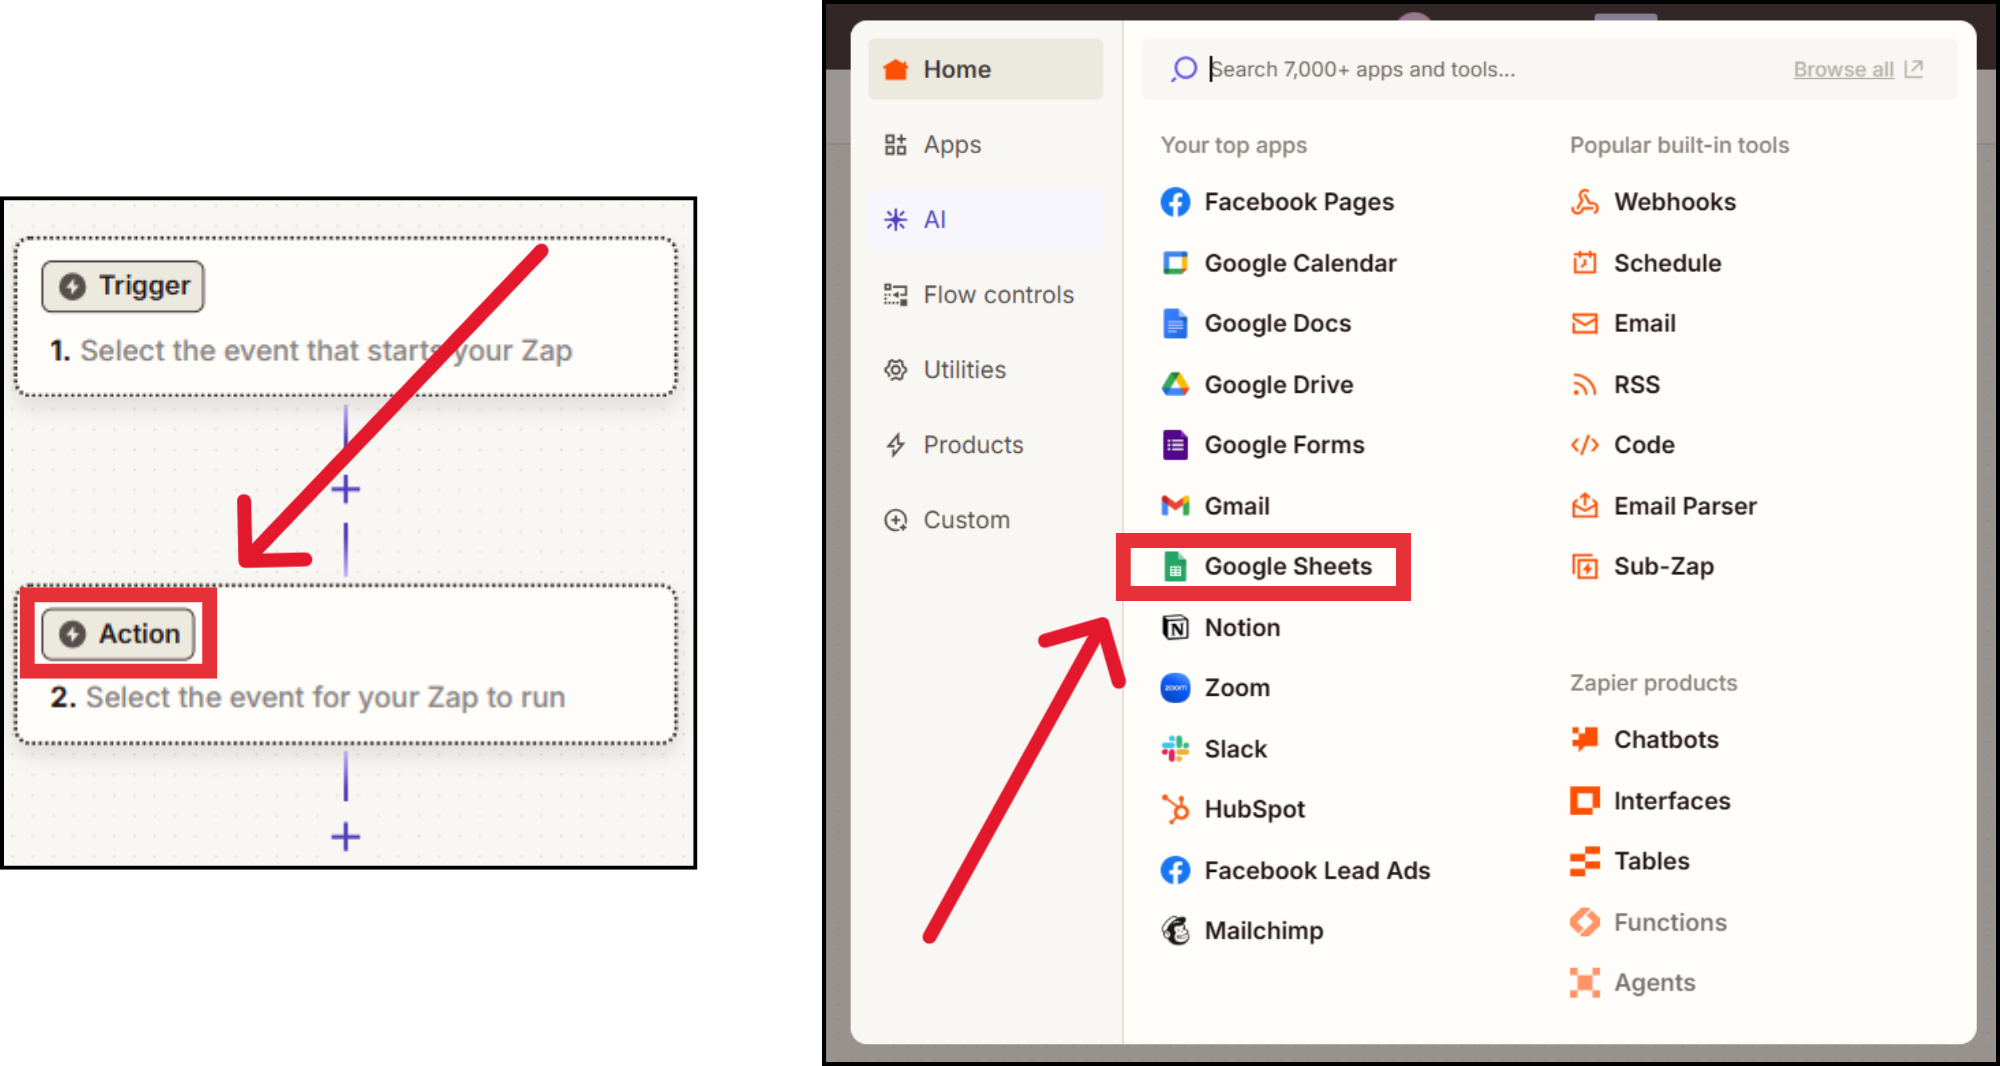
Next, choose what should happen when a new email arrives. In the Action section, search for Google Sheets and select it. Pick Create Spreadsheet Row as the action. This way, Zapier will add a new row to your sheet each time you get a new email.
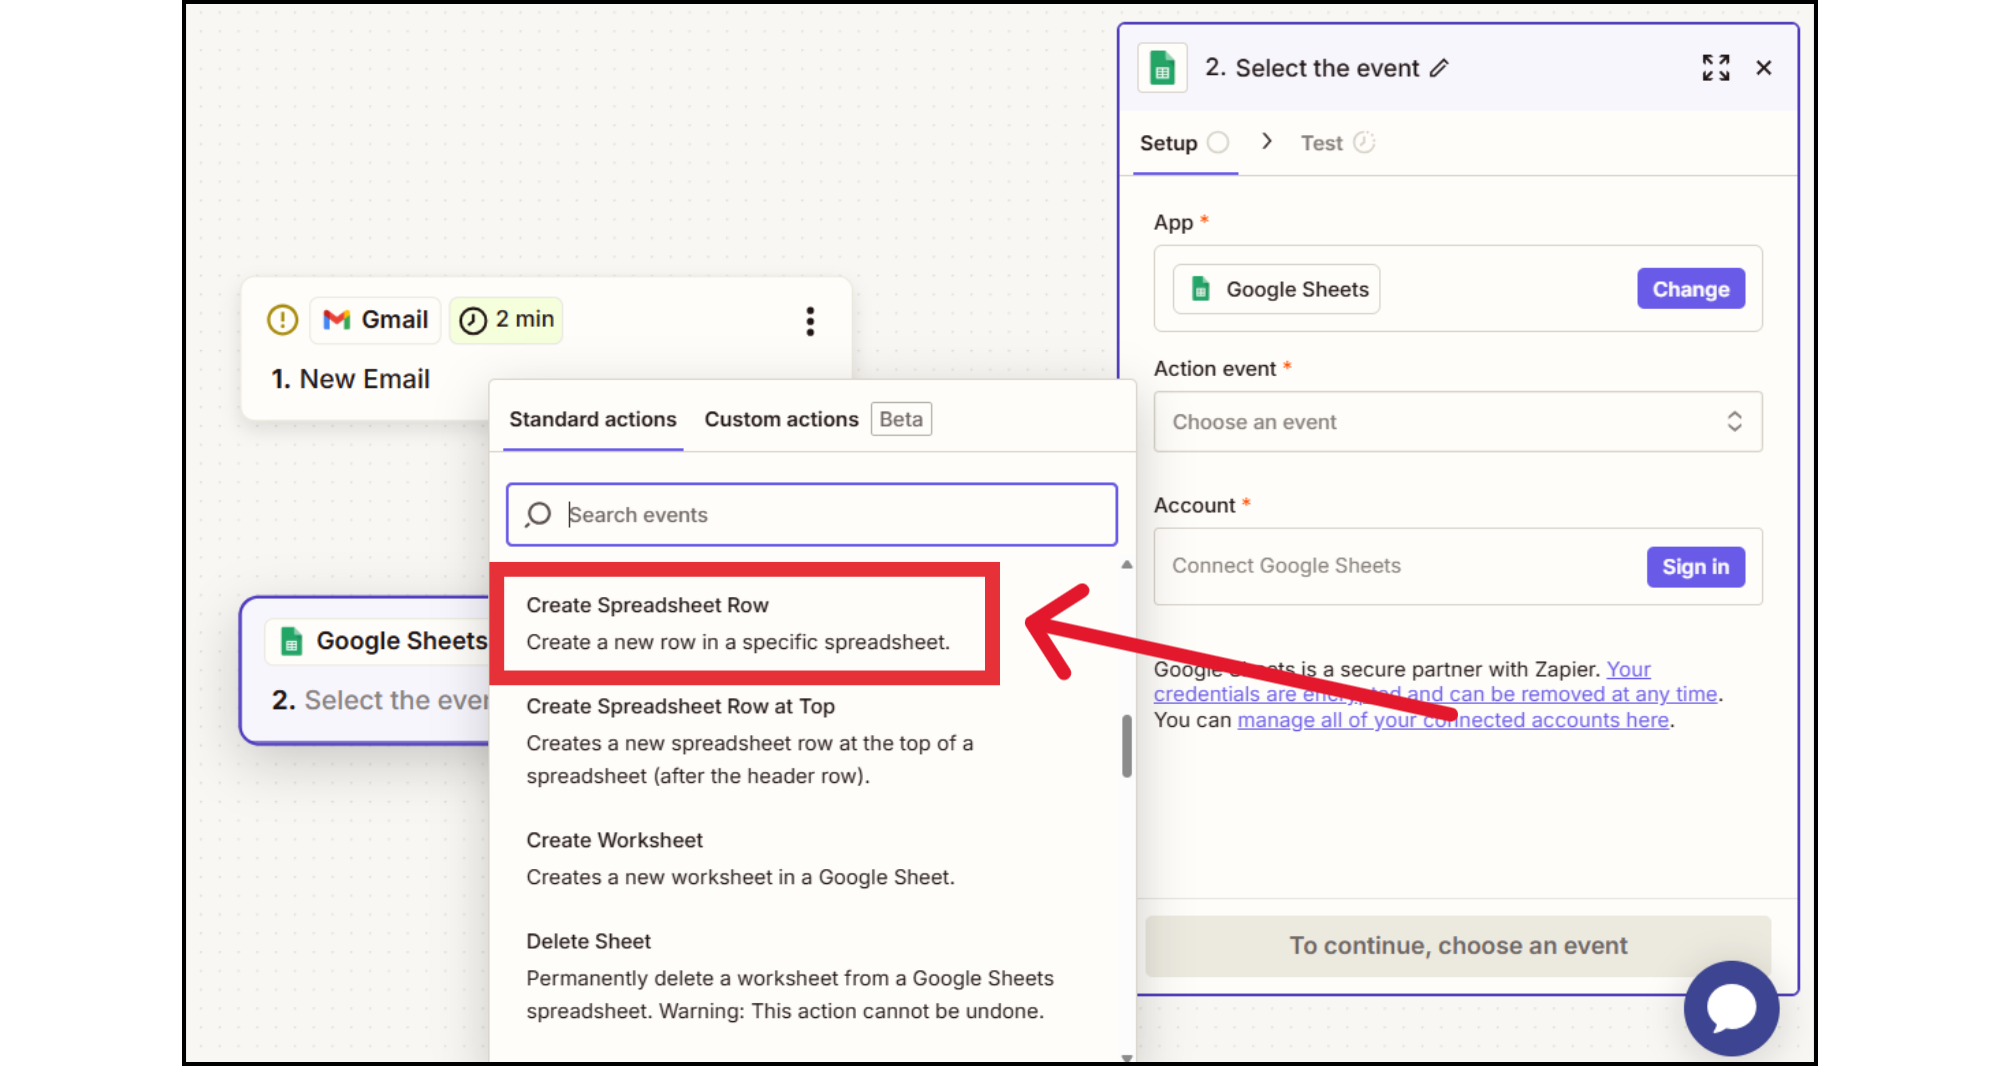
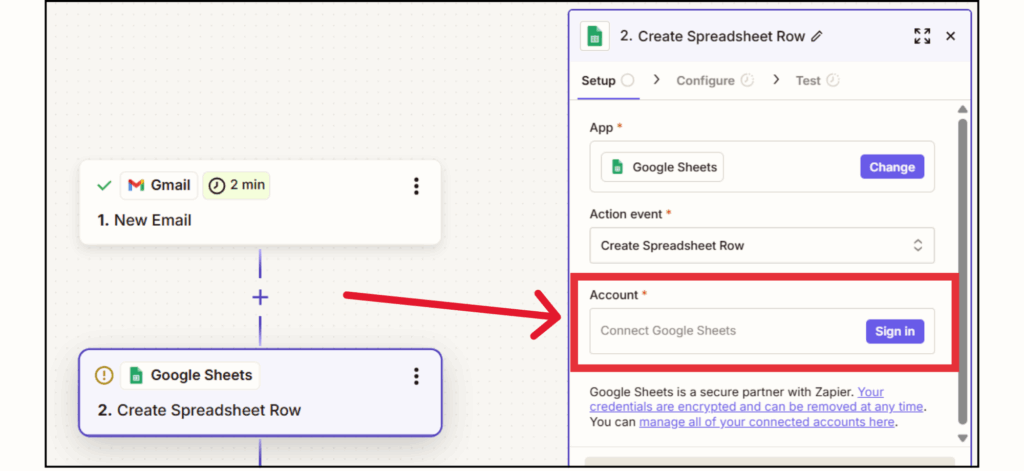
Click Sign in to Google Sheets and pick the account that owns your spreadsheet. Give Zapier access so it can add data for you.
Choose the spreadsheet you want to use, then pick the worksheet (tab) where your data should go. Zapier will show you the columns so you can match them with the right email details.
For each column, choose the email data you want to capture:
This step makes sure every new email is saved with the right details in the right spot.
Click Test Action to send sample data to your spreadsheet. Open your Google Sheet and check that a new row has appeared with the right email details. If it looks good, you’re all set.
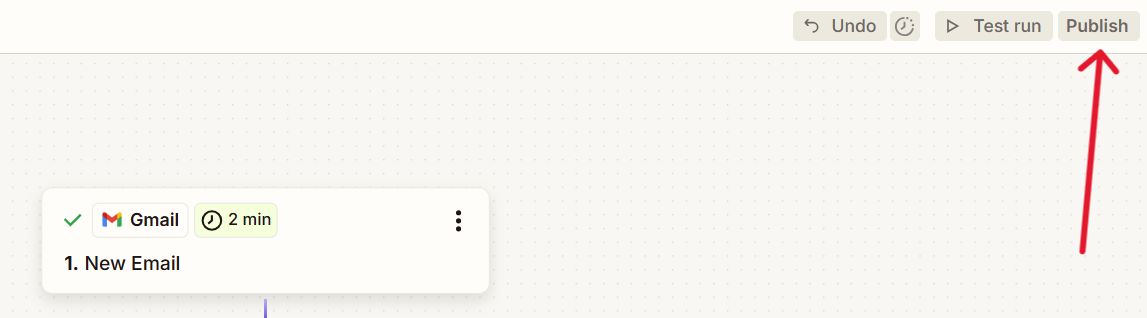
Click Publish to turn on your automation. Now, every new email that matches your trigger will be added to your spreadsheet automatically.
This automation does more than just save time. It can truly improve how you work. Here are some ways entrepreneurs are putting it to use:
These examples show how automation can help you move from reacting to emails to taking control of your workflow. When your data updates on its own, you can focus on strategy instead of sorting. With a few smart changes, you can make this system even better.
Once your Gmail to Google Sheets automation is live, these enhancements can help you get even more value out of it:
Use Gmail filters to choose which emails trigger your automation, such as messages from certain senders, with specific keywords, or marked as a priority.
Integrate with other tools to build a more powerful system:
You’ve seen how Gmail to Google Sheets automation works, why it matters, and how real entrepreneurs use it to simplify their operations. But this is more than just a tool; it can be a turning point for your business.
When your inbox becomes a source of structured insight instead of scattered noise, you stop reacting and start leading. You build systems that support your growth, not just your day-to-day.
Set it up once and let your email start working for you, every time.